How To Build A Drystone Wall - Part One

Part of our job as drystone wallers is to preserve the craft we work in, and we do this in a few important ways: through our part in maintaining the huge network of drystone walls that already exists in Scotland, by building new drystone and using traditional skills every day, and finally, by passing on knowledge of the craft to others. So, with that in mind, here is our beginner’s guide to drystone walling.
PPE
I always use eye protection when taking a hammer to stones, stone chips/dust fly everywhere and can cause serious and long term damage to your eyes and lungs. When working on the lower courses of the wall, or any situation where my knees might touch the ground for more than a minute or two, I wear knee pads. This saves my knees from huge amounts of unnecessary wear and tear and also makes working conditions far more pleasant, especially on cold and rainy days. I also wear gloves every day, handling stones can tear up your hands quickly and I’m keen to avoid any injury. Finally, just the other day a waller from the US reminded me that water is one of the most important forms of PPE. Staying hydrated reduces chance of injury and also speeds up recovery time after a long day at the wall. Yes, it’s satisfying work, but it’s hard work too. Make sure to do all you can to look after yourself.
Organisation
It’s worth remembering that a metre of standard height drystone wall (1.2m) contains around a tonne of stone. So the three wheelbarrows of stone you found behind your shed aren’t going to go very far ;) As there is so much stone in each wall, it’s important to keep your work area organised and clear. We use a finger height system for sorting stones. To ascertain which pile a stone goes in, hold your hand against the side of the stone and decide how many fingers high it is. At this point it’s also a good idea to separate your copes, throughs and cheekend pieces. A good cope stone will be the same width as the top of your wall, a good through stone spans the width of your wall at around 60cm high, and cheekend stones are rectangular and long, 90 degree angles are ideal.
Tools
Tools that are useful to a beginner are bars and string. A wheelbarrow and pinch bar are also useful. Shaping stone with tools is a skill in itself, so for now, do it the way our ancestors did and put the stones in the wall the way you find them.
From the bottom up - Features of a drystone wall
Foundations - Typically the largest stones in a drystone wall and are the first stones you place.
Course - Each ‘layer’ of a drystone wall. There are different styles of building that mean courses are placed differently.
Hearting - The packing that is placed internally within a drystone wall. It is unseen but integral.
Throughs - Usually placed at roughly knee height in a standard height dyrstone wall (1.2m) these stones span the width of the wall and ‘tie’ it together to prevent movement. Any wall of 1 metre and above should have throughs placed roughly 1 metre apart. Typically harder to find because of their size, throughs should be placed as often as they are available.
Copes - Another element that ‘ties’ the wall together. Copes also close the top of the wall, sealing it off to debris and weather. There are various styles of cope stones to choose from. These styles are often regional.
The Basics
Stones length in
This simply means that more of the stone should be going into the wall than along it. Stones should also reach at least a third of the way into the wall. A stone that doesn’t follow these rules is referred to as ‘traced’ but a few ‘traced’ stones in a wall are acceptable. If you are going to trace a stone, try to make sure it’s in the top 1/3 of the wall, place stones length in on either side and do not trace on top of it.
Below you can see two examples of stones placed length in on a foundation course of a wall. It’s also important to have as much contact between the stones as possible. That simply means as much as one stone touching the next as possible. Where there isn’t direct contact between stones, we use hearting.


Hearting packed tightly and placed with intent
*Hearting refers to the stones that are placed within a drystone wall, and it is integral to the wall’s structure. As I said above, you are aiming for as much contact between the stones as possible, but any area internally where there is not contact, you fill with 'hearting'.
It’s a good idea to use stones that are appropriately sized for the space you are filling. If you can fill the space with one stone, that is better than using two. However, we do what we can with what we have. As long as the space is tightly packed with hearting it will do its job.
When placing hearting, every piece should be put there by hand. It might be tempting to tip a bunch of loose stones into the top of the wall. Don’t. As you place the pieces of hearting look under stones and between stones for any spaces that can be packed.
Place your hearting as the wall comes up. Put your foundations in; add hearting. Put your first course of stone on the wall; place hearting. Second course; hearting. Third course….you get the idea.
Something worth noting is that you will never, ever have enough hearting. So, prepare it in advance, keep in it piles/buckets next to your wall and take time to top it up regularly. Running out of hearting halts building.
*I believe hearting is more of a Scottish term and you may hear it described as 'packing' or ‘filling’ elsewhere.


Cross your joins
One stone over two and two stones over one. If you don’t cross your joins, sections of the wall cleave away from each other under any force (like gravity). Just like in LEGO. We’ve all made the mistake of building tall columns of single LEGO bricks and then accidentally knocking one over. If LEGO walls are built properly (with all the joins crossed) you have to take them apart with your teeth!
Ideally, you want each stone crossed to around its midpoint. This will build the strongest wall. However, as long as the stone that is crossing the join isn’t hanging onto the edge of the stone below, you should be fine. The stones that do hang onto the very edge of other stones are referred to as a ‘marginal’.
The examples below will give you a solid idea of what crossing your joins should look like. You may notice a few exceptions to this rule in one of the walls. These are snecks, and once you master the basics of drystone, things like ‘snecks’ (the sexiest part of drystone) can be introduced.


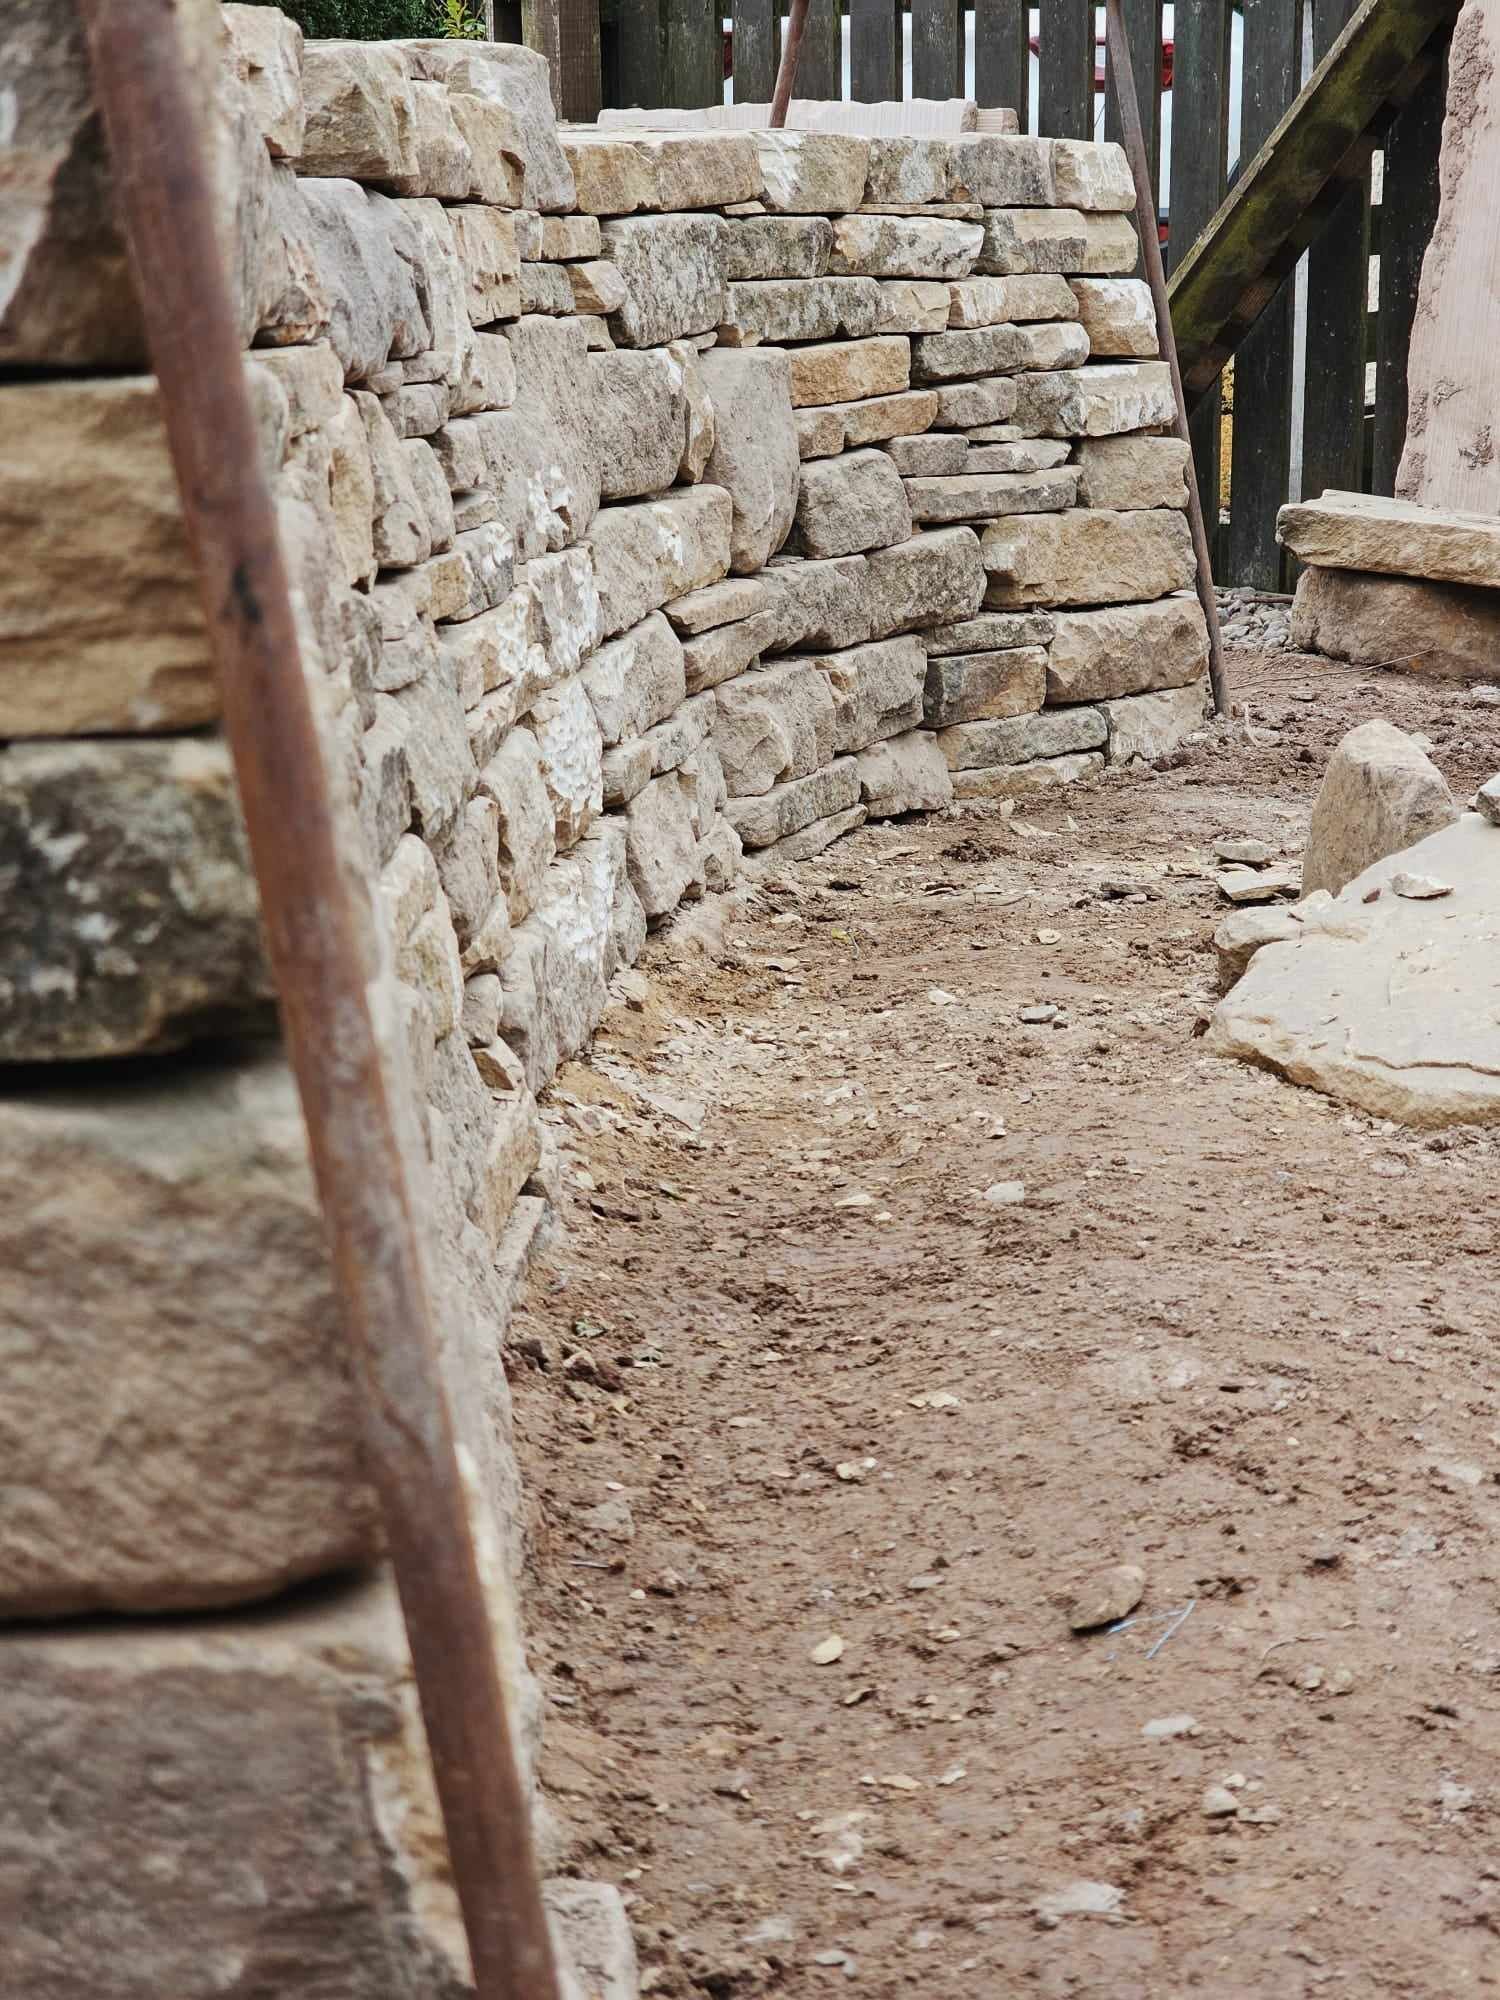
Build with the batter of the wall
The batter of a wall is an inward slope of the wall from bottom to top. This batter forms an A shape and provides another level of structural strength to a drystone wall. Stones should be placed with this slope in mind as the wall goes up. You can use batter boards, bars and string, or if you live dangerously (and don’t mind asymmmetry) you can do it by eye. There is an accepted batter ratio for standard height drystone walls, but for those just starting out, as long as your wall forms an A-line, you’ll be OK.
Each stone has several faces and part of your job is choosing which face will be seen in the wall. Ideally the face of your stone has a similar slope to your wall (inwards from bottom to top) and is also as level as possible across that plane. The truth is, unless your working with a level-bedded stone like sandstone, the best face isn’t always obvious. Sometimes there isn’t a really great face, and this is where stone shaping would come into play. However, as drystone, at its core, is about doing what you can with what you have, just aim to get your stones length into the wall. Function before beauty.
The goal is to glance down the line of your wall, and see neat lines. There shouldn’t be any stones sticking further out than others. As the wall comes up, due to the slope of the stone’s faces, or placement, each course will sit slightly further back than the course below.
In the examples below the batter of the wall is clear, as is the placement of the stones to achieve this.


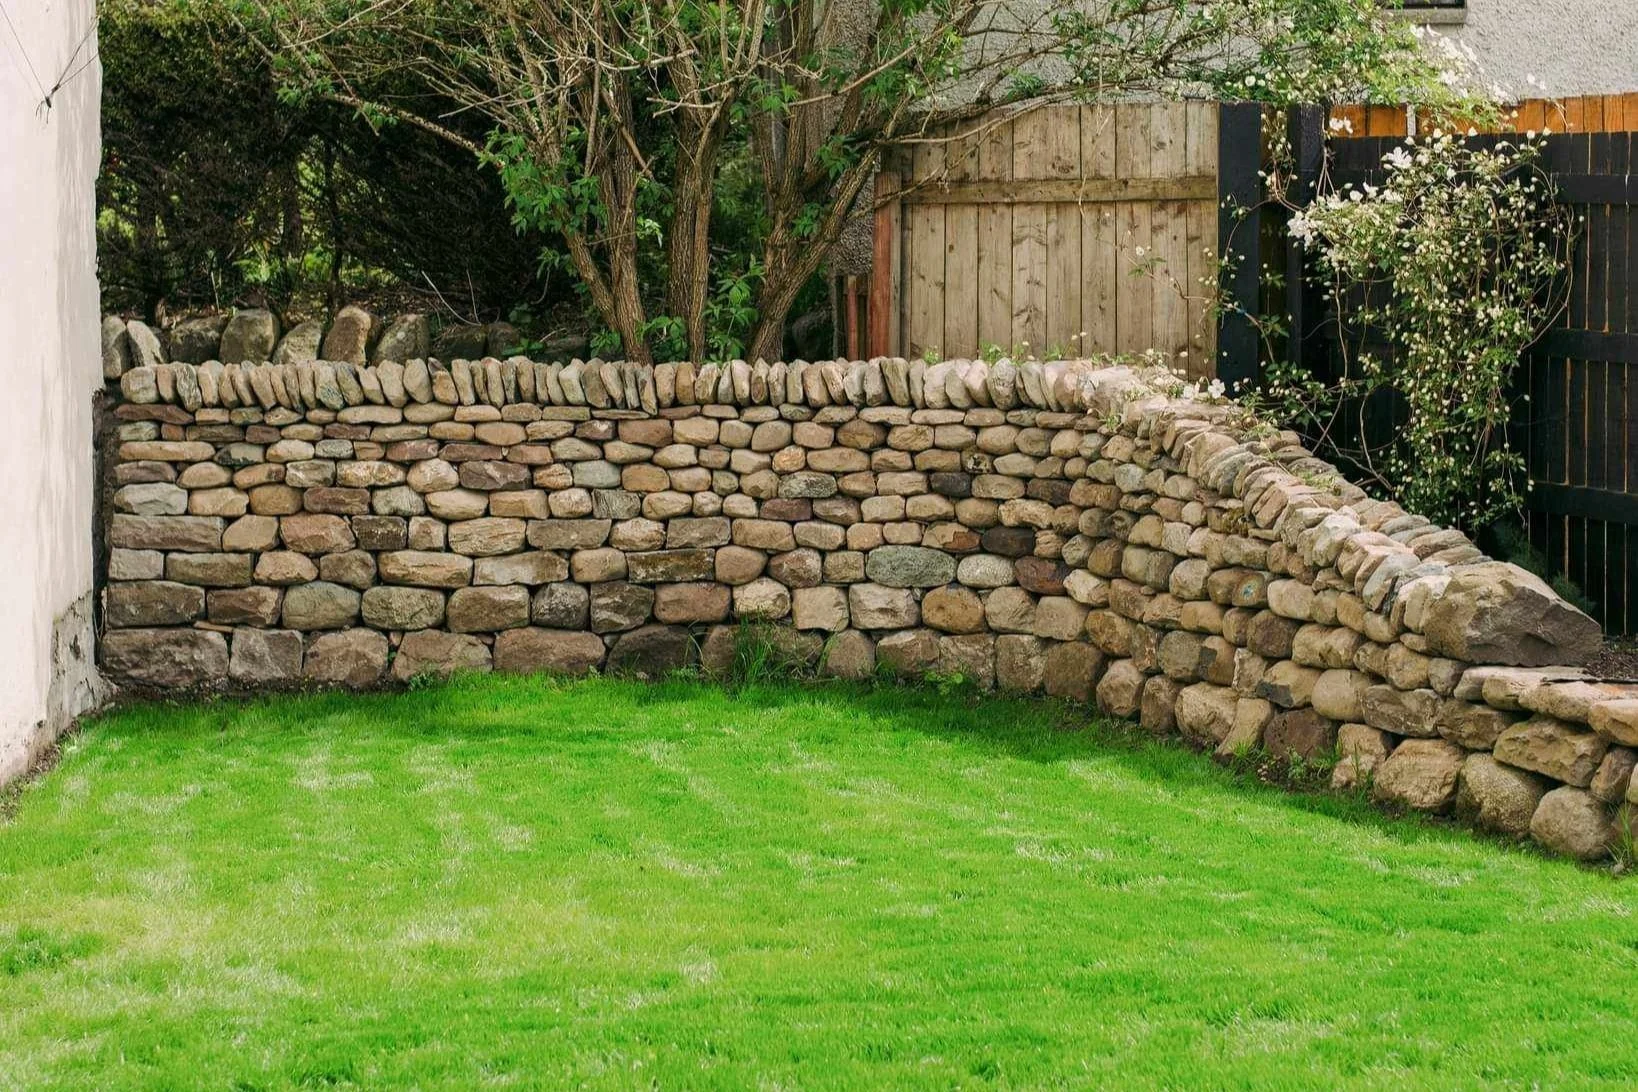
Styles of wall
There are three main styles of building in drystone. Coursed, semi-coursed and random. Each has advantages and disadvantages and will largely be decided by level of skill and the stone you have available. Some stone just can’t be coursed and will only be suited to a random style.
A coursed wall is when each stone on a particular course is the same height along the length of the wall. This creates clearly deliniated layers.
A semi-coursed wall is when these layers are broken by stones that extend into the courses above. Each course/layer is still visible but the lines of the wall are more interesting, and in my opinion, the wall has better visual flow. This style is when snecks and jumpers come into play.
In a random wall, there are no clear courses.
Personally, I find semi-coursed walls the easiest to build, and the most enjoyable.
Photos below - coursed, semi-coursed and random.


Foundations
The Ground
Each metre of standard height drystone wall weighs around a tonne. Therefore, it’s important that the ground underneath the wall is solid. Waterlogged or soft ground will mean that the wall will sink under its own weight. Sometimes digging down a small distance is enough to find a harder surface, and if not you can place something like gravel under your foundation course.
Width
On a standard height drystone wall (1.2m) the width of the foundation course is roughly 650mm-750mm coming up to an eventual width of 350mm. Before placing your foundations, you will decide how wide you want the bottom of your wall to be. This will often determined by the space you are working in and the stone you have. It’s not exact, but a good rule of thumb is that the top of your wall should be roughly half the width of the bottom (for a full height wall). If your wall falls somewhere under full height you can expect the width at the top of your wall to be larger. Batter can be adjusted (steeper or straighter)to give you a specific size at the top of your wall for example if you have cope stones of a sepcific size.
Placing the stones
Foundations are typically the largest stones in your wall. It’s probably easiest as a beginner to create a foundation course that’s uniform. This may involve digging some stones down so they sit at the same height. Stones should also be as level as possible, not tipping forward or backwards, side to side in the course. A long spirit level can be useful for checking this.
Courses
Placing your stones
Once a stone is in place (best face forward, length into the wall, as level as possible) it shouldn’t wobble or rock. If it does, you can use pins to secure in place. Pins are smaller pieces of stone that are usually placed at the back of, or underneath the stones in the wall to secure them.
Build evenly
Build along your wall making sure both sides come up evenly. Complete both sides of a course and place hearting before moving on up the wall.
Contact
As I’ve said, you want as much contact between the stones you place as possible, but due to the myriad of different shapes of stone you will encounter, 100% contact isn’t likely. However, it’s good to aim for full contact at least at the front of the stones, the part that is visible in the wall.
In Part Two I will discuss, retaining walls, cheekends, copes and throughs.